Download the ISO image and burn the same onto a USB stick.
Insert the USB stick in the server and power on (My server is Dell R430)
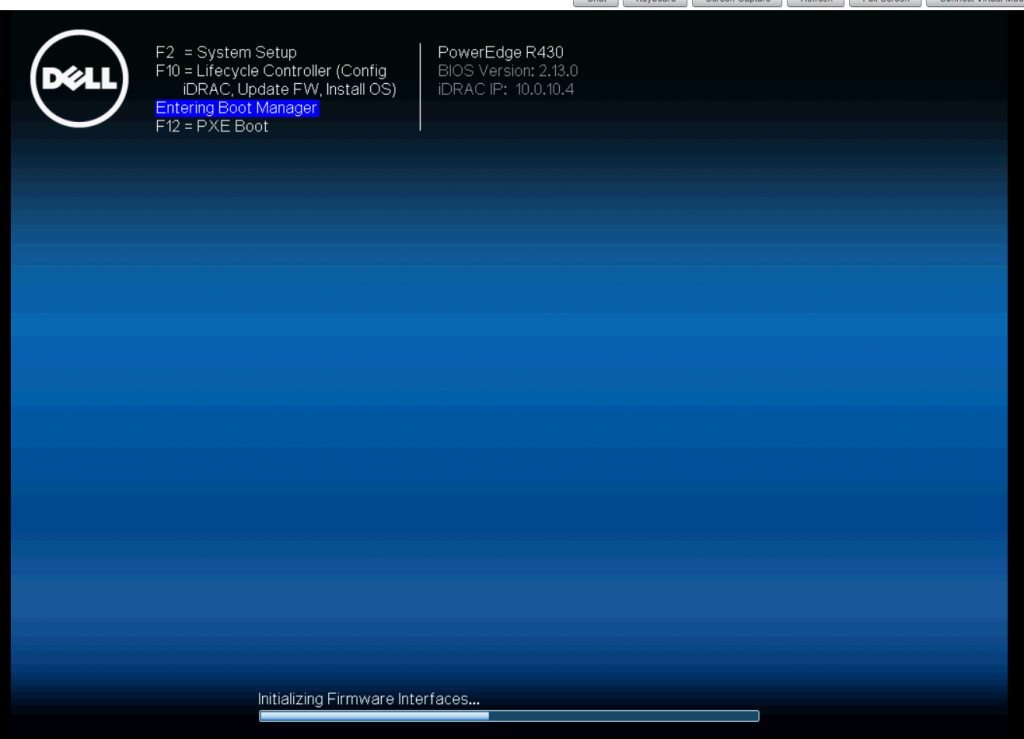
Press F11 and enter Boot Manager
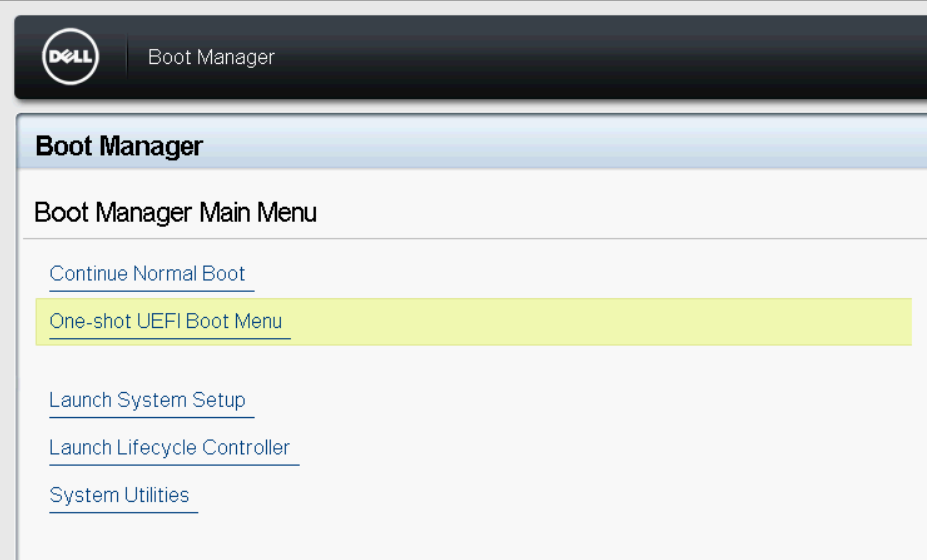
Select Oneshot UEFI Boot option
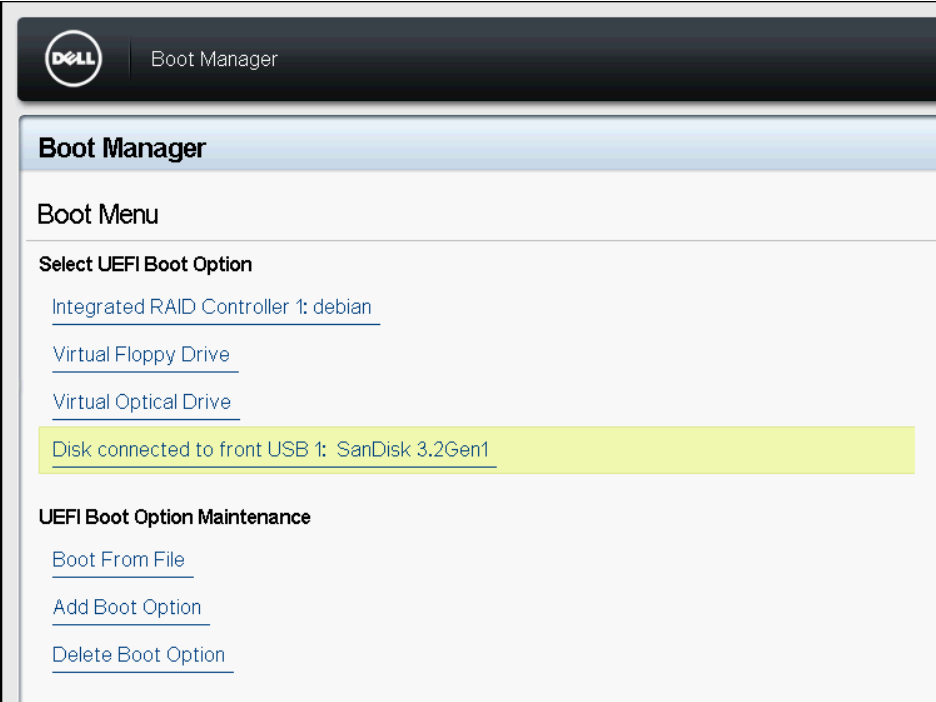
Select boot from the USB stick
Select Install Server

Select English Language (or whatever your choice is)

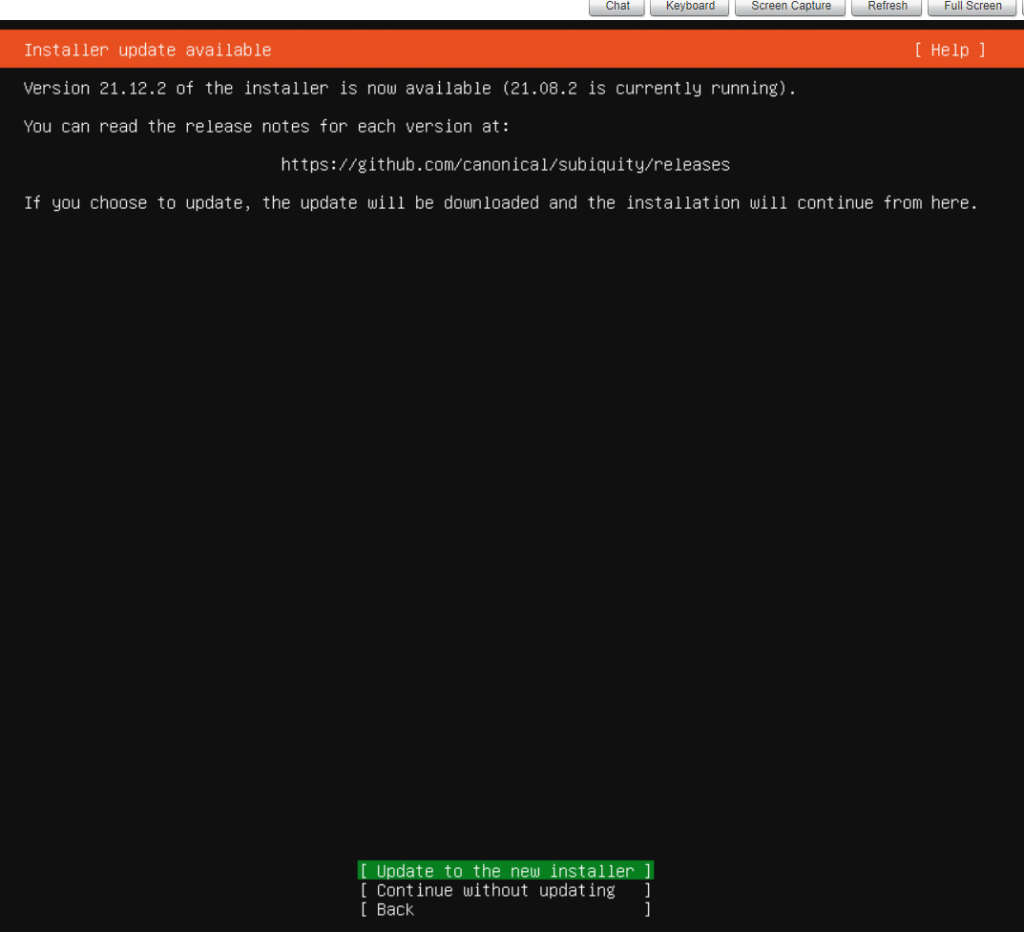
I preferred to update the installer
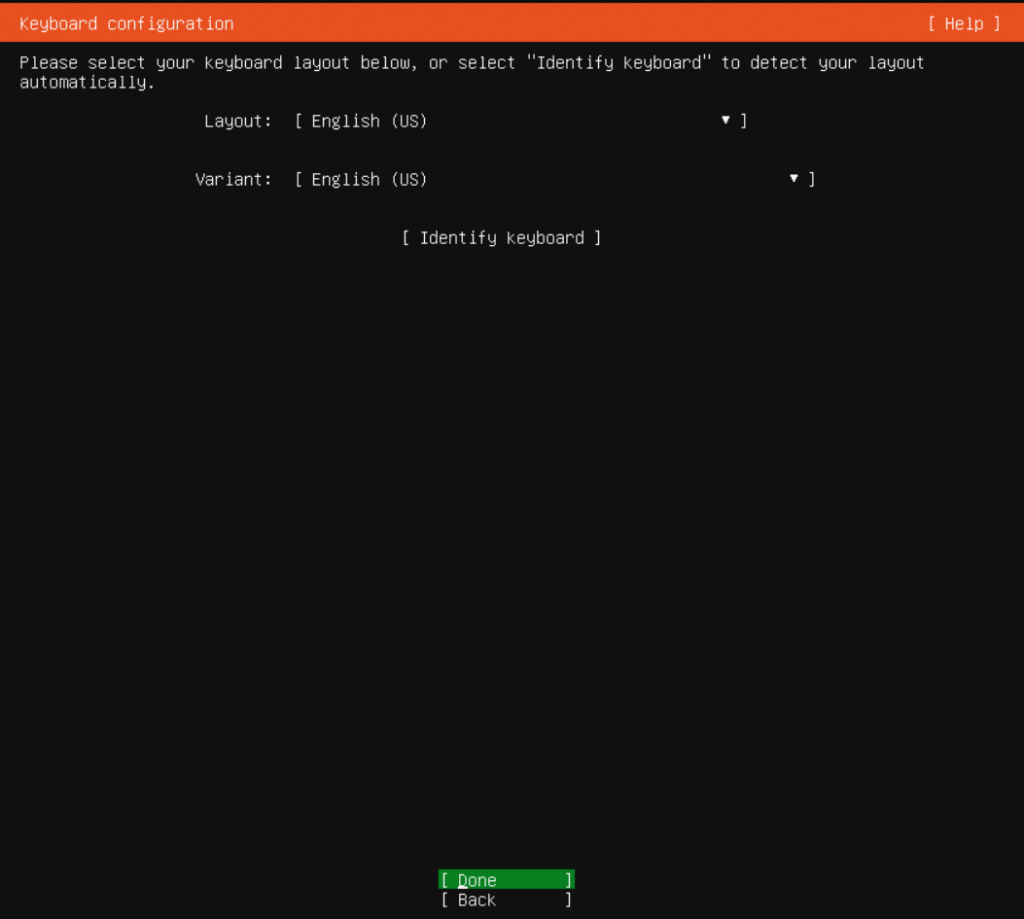
Default keyboard layout
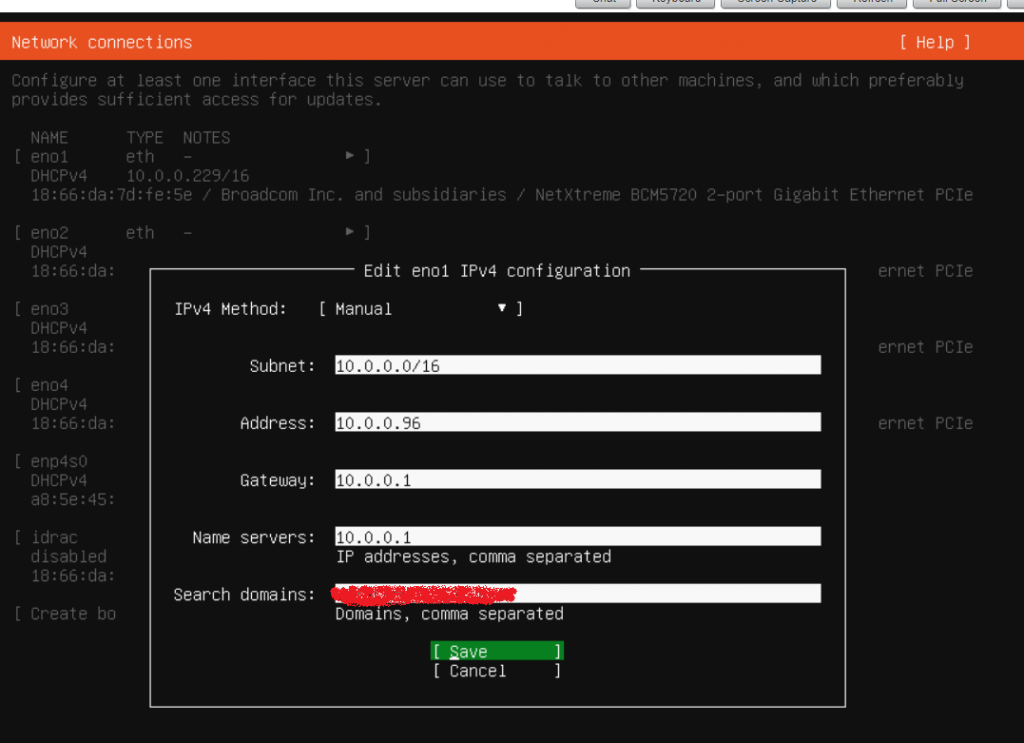
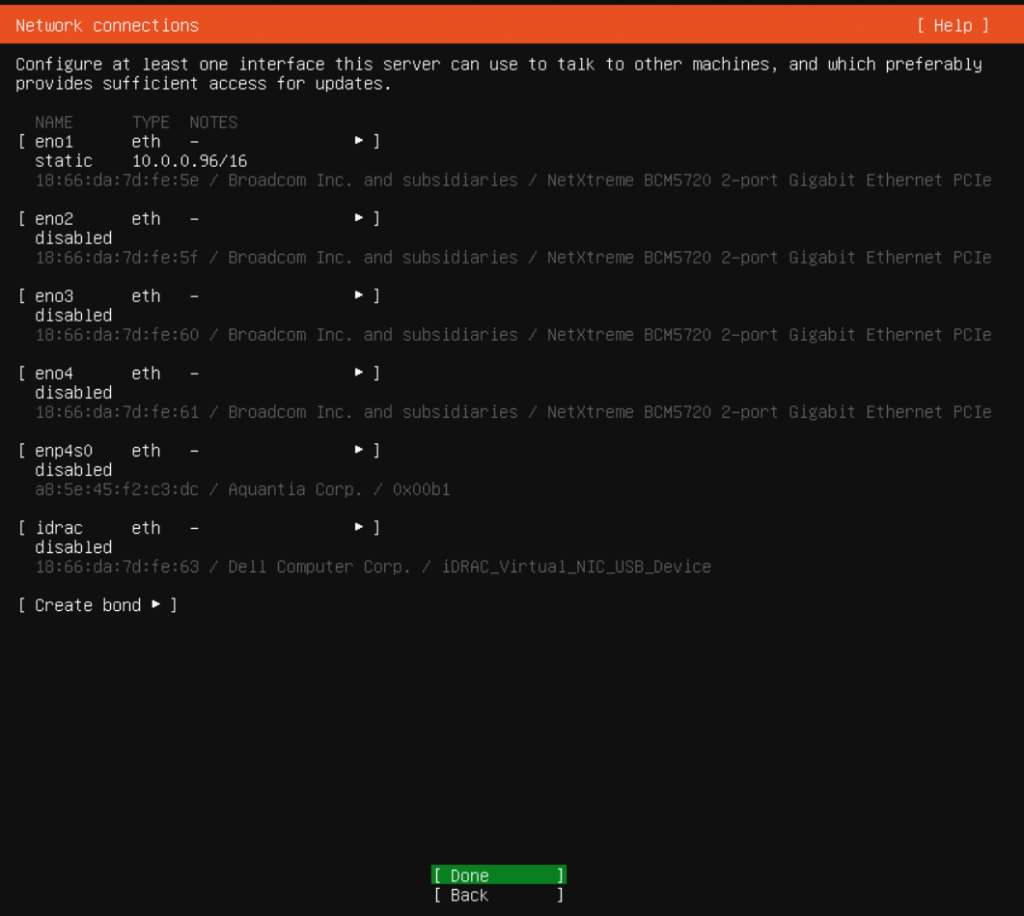
Configure static IP for the first interface
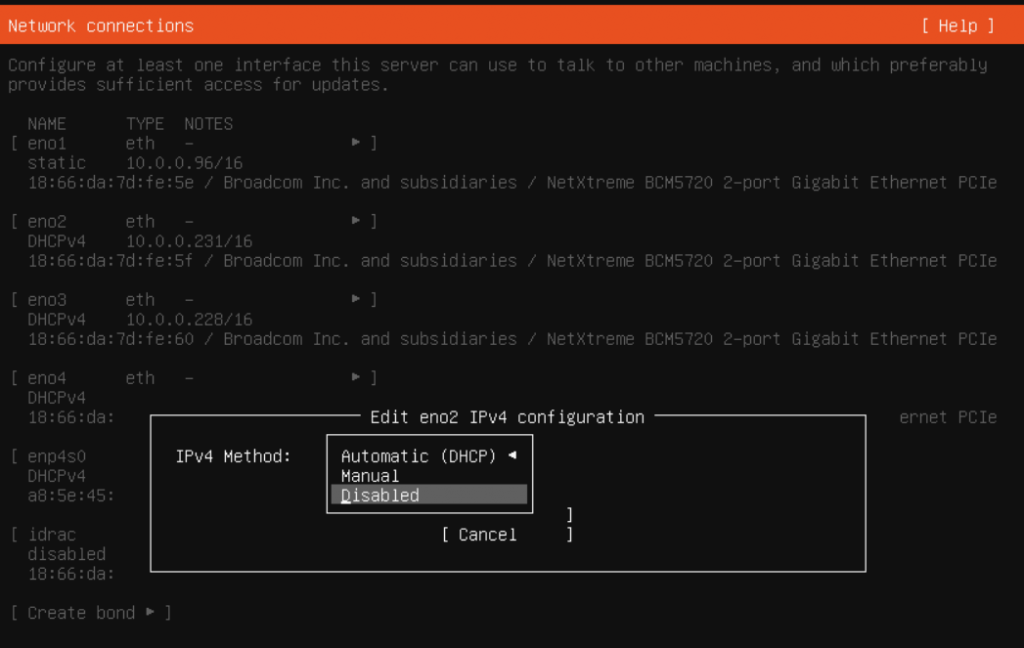
Disable configurations for other interfaces – we will configure after the installation as required.
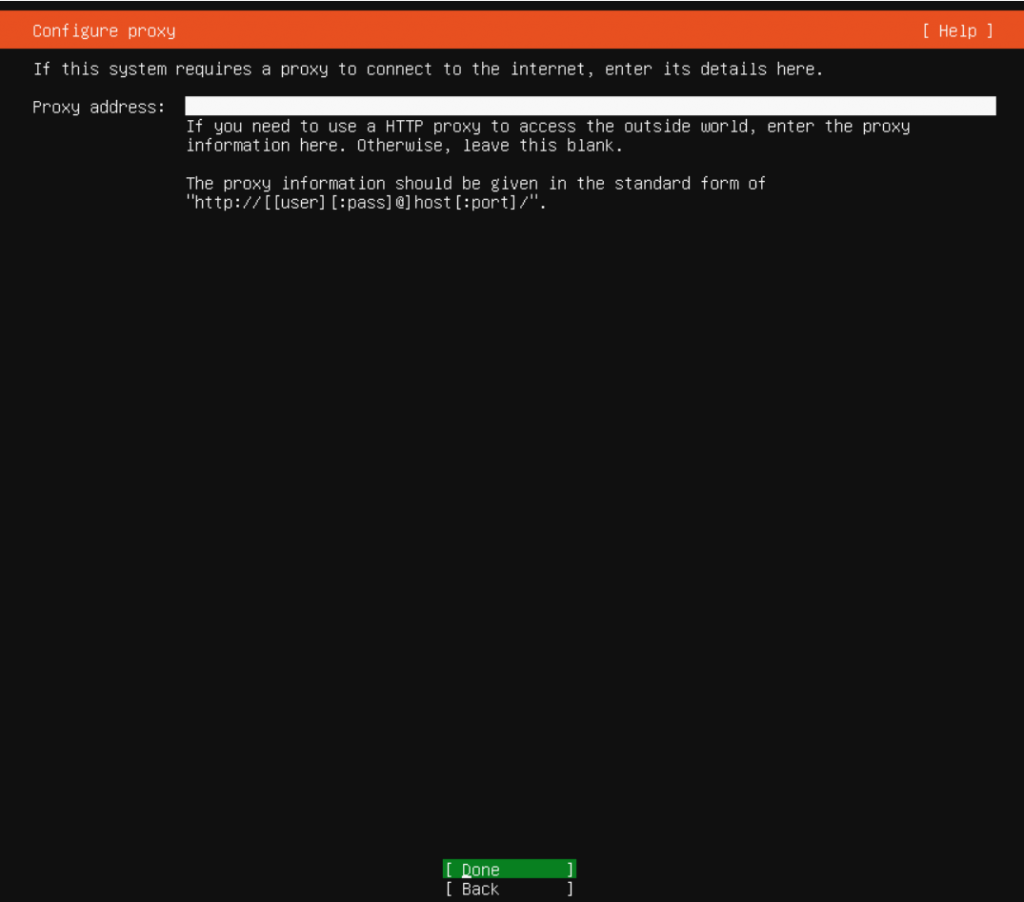
No proxy (in my case)
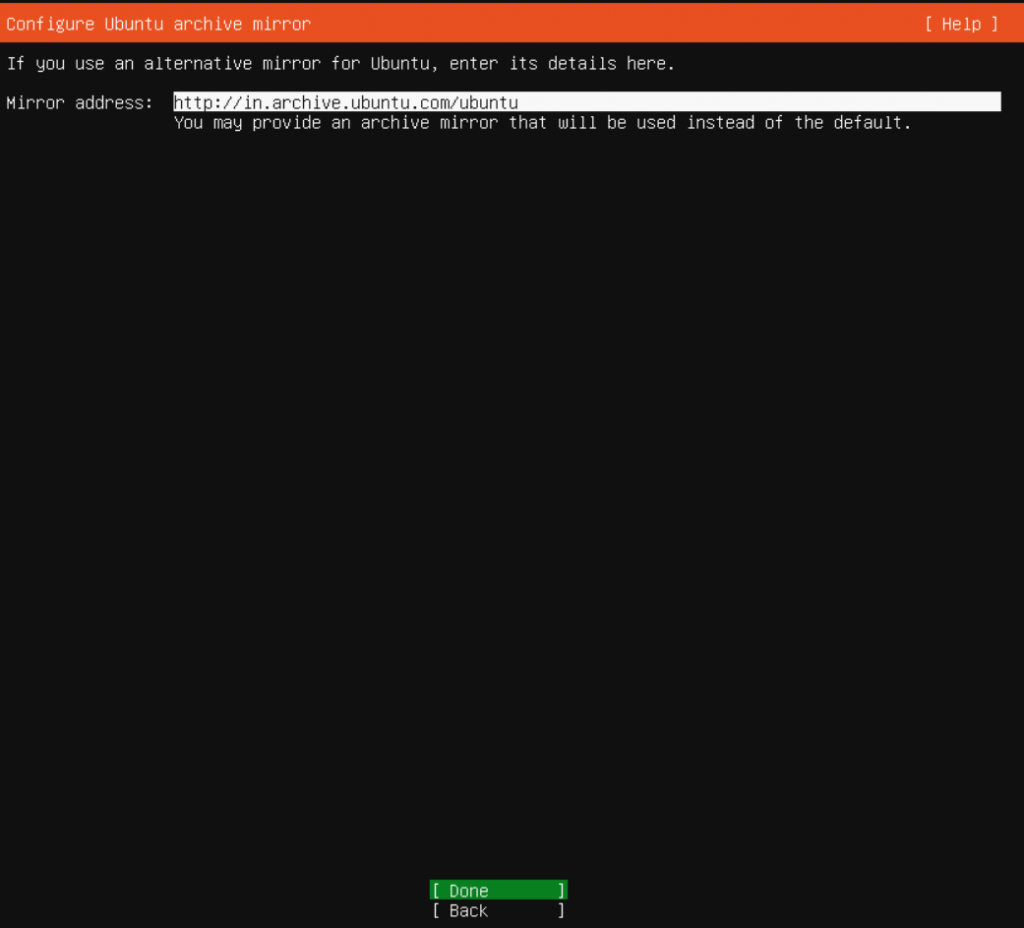
Default mirror
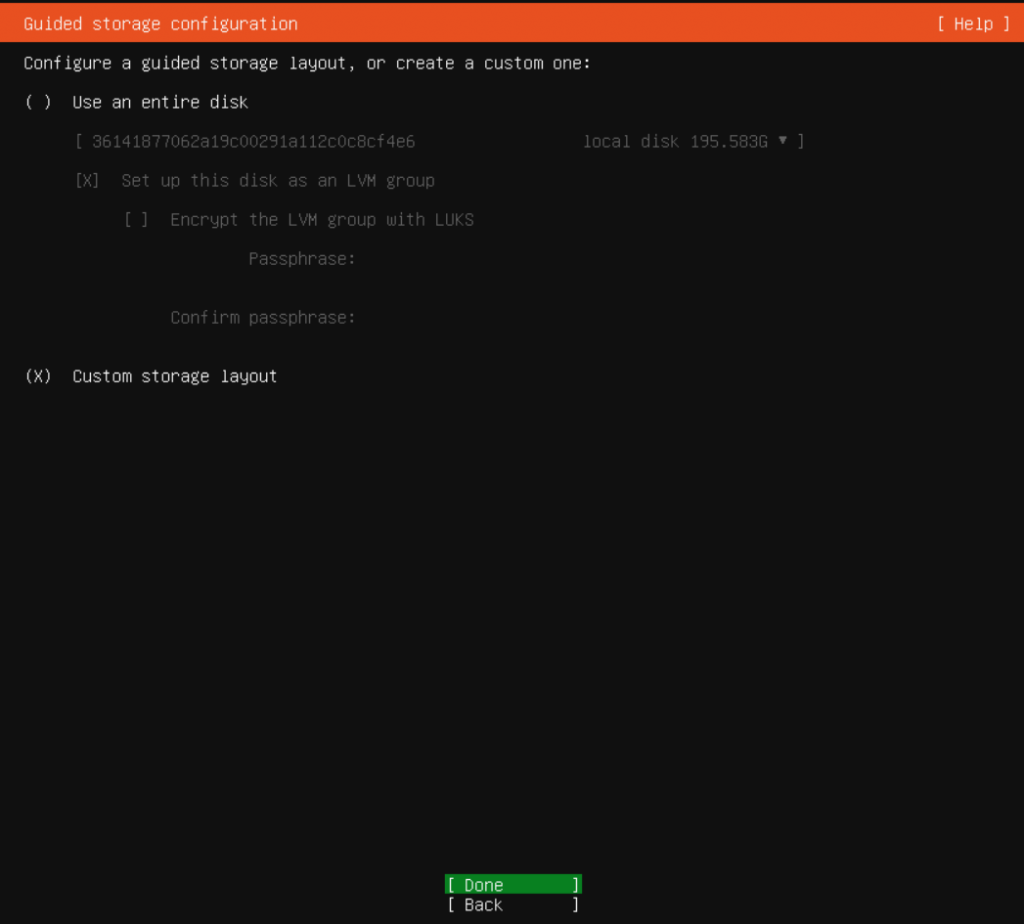
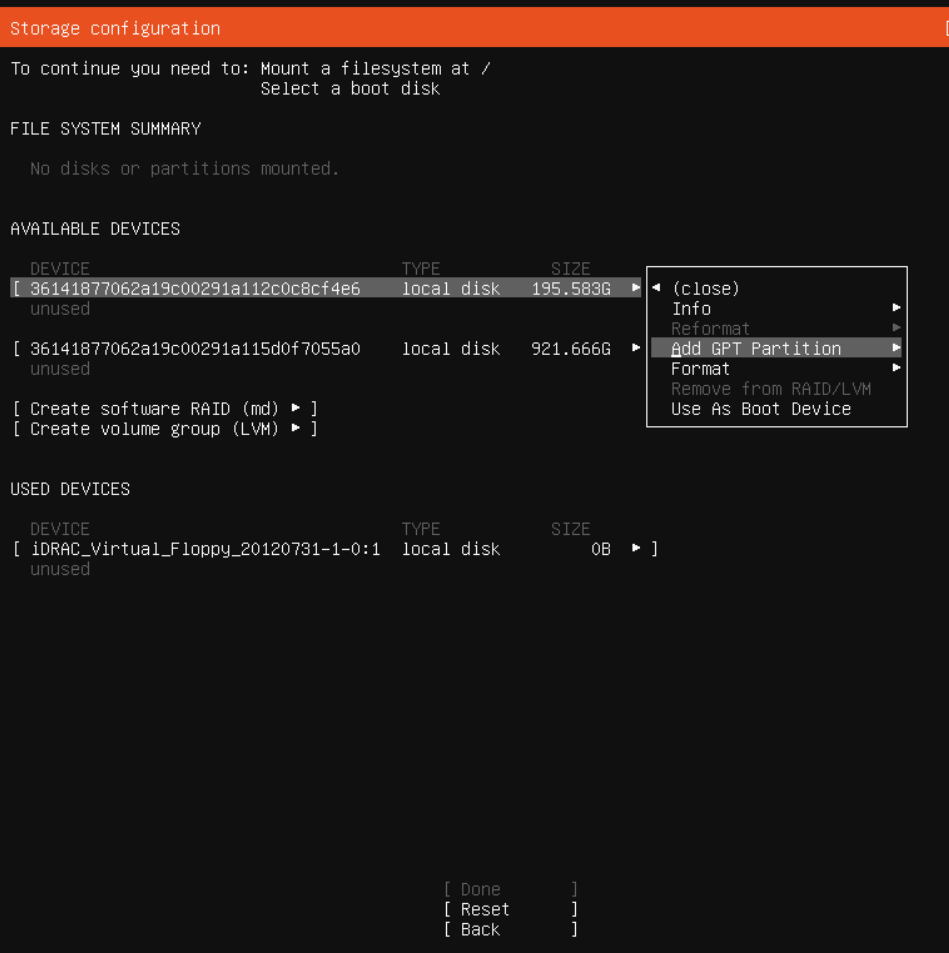
I always prefer custom storage
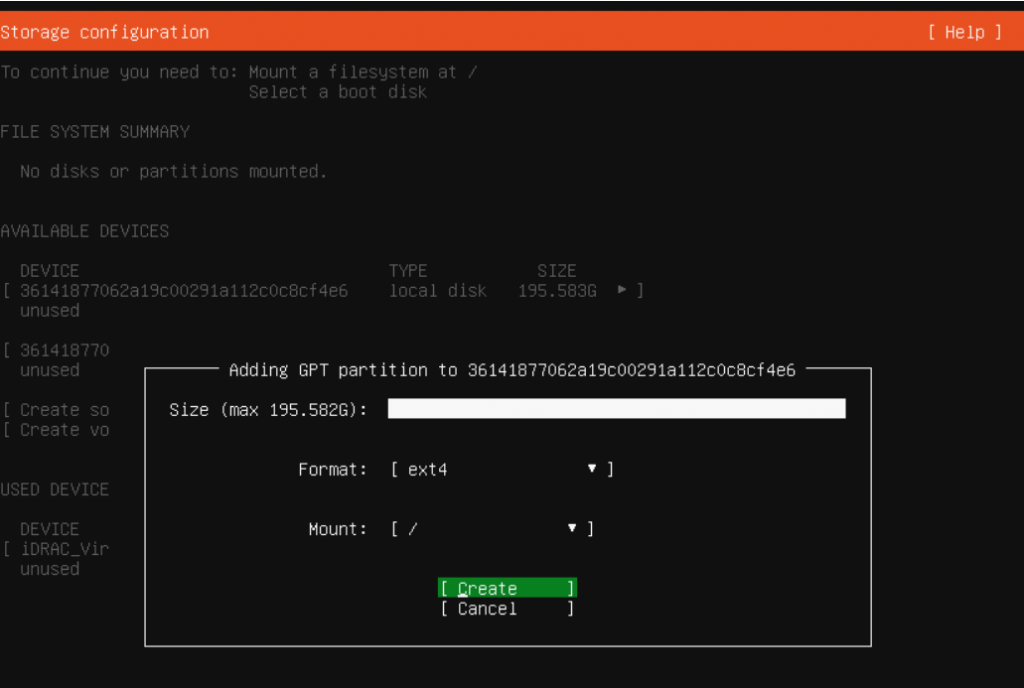
Add GPT Partition
Single partition (my preference)
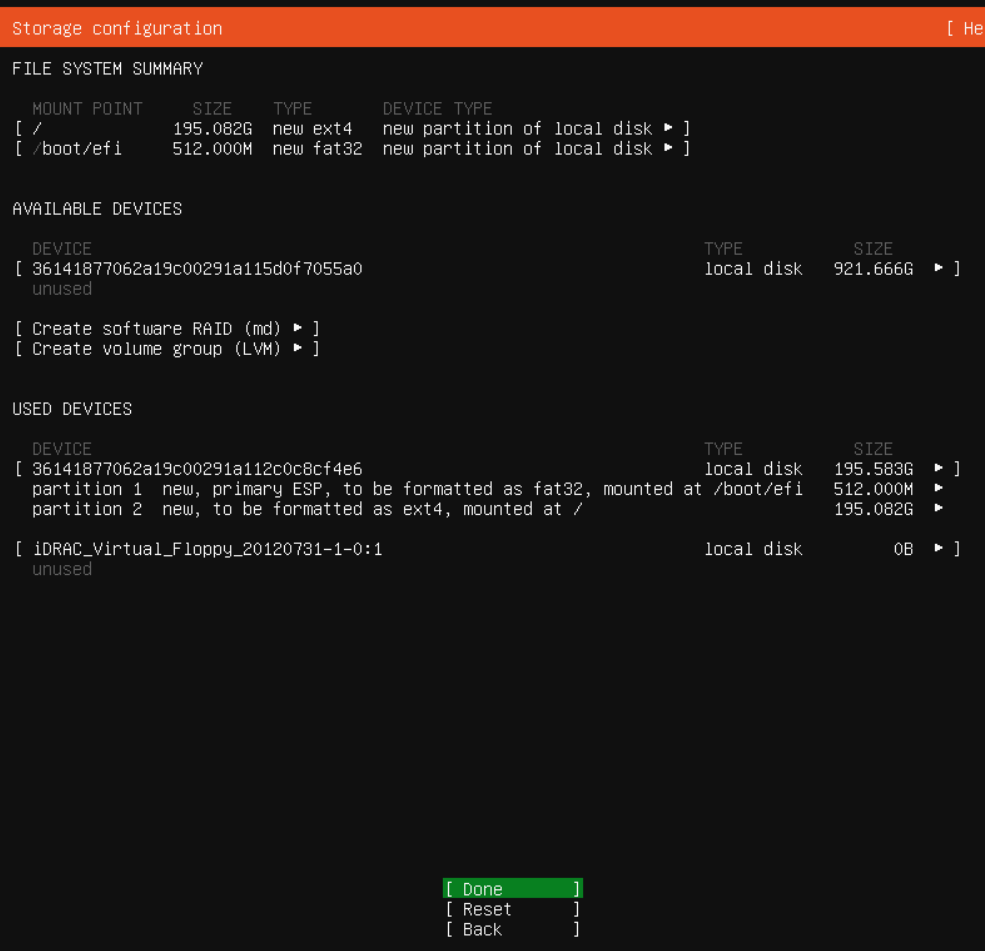
Done with partition configuration
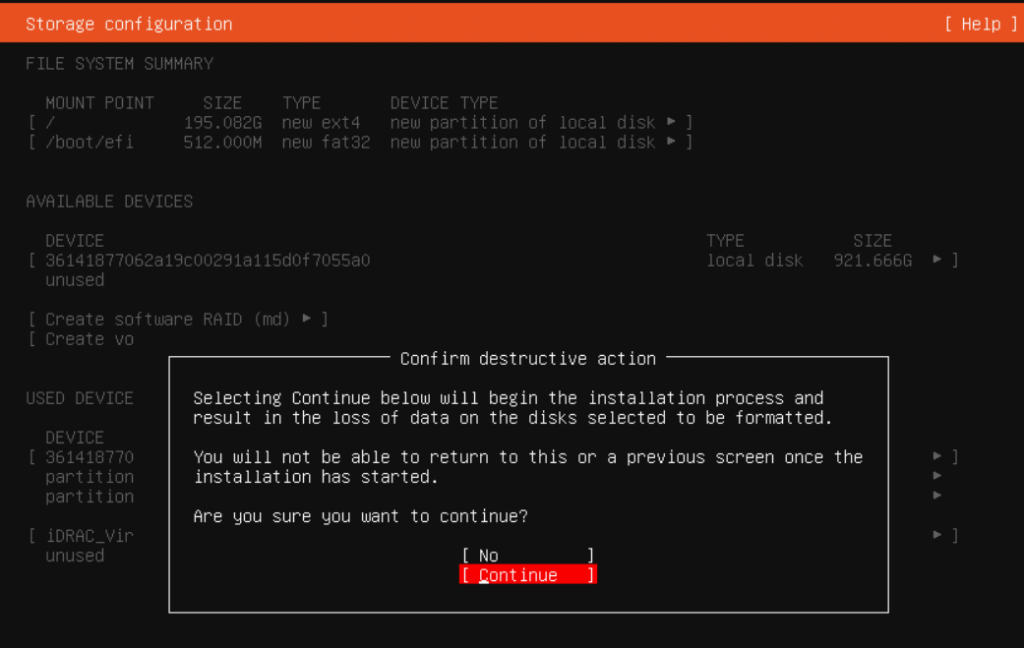
Confirm and continue
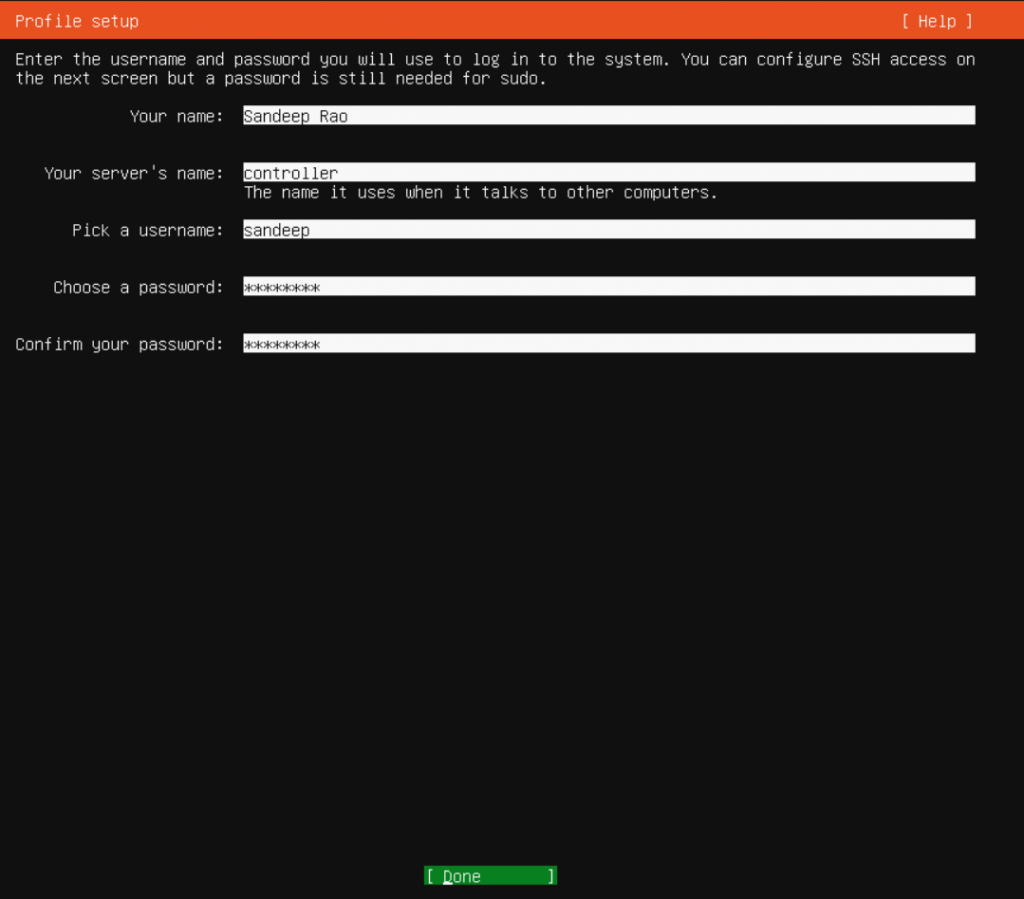
User account setup
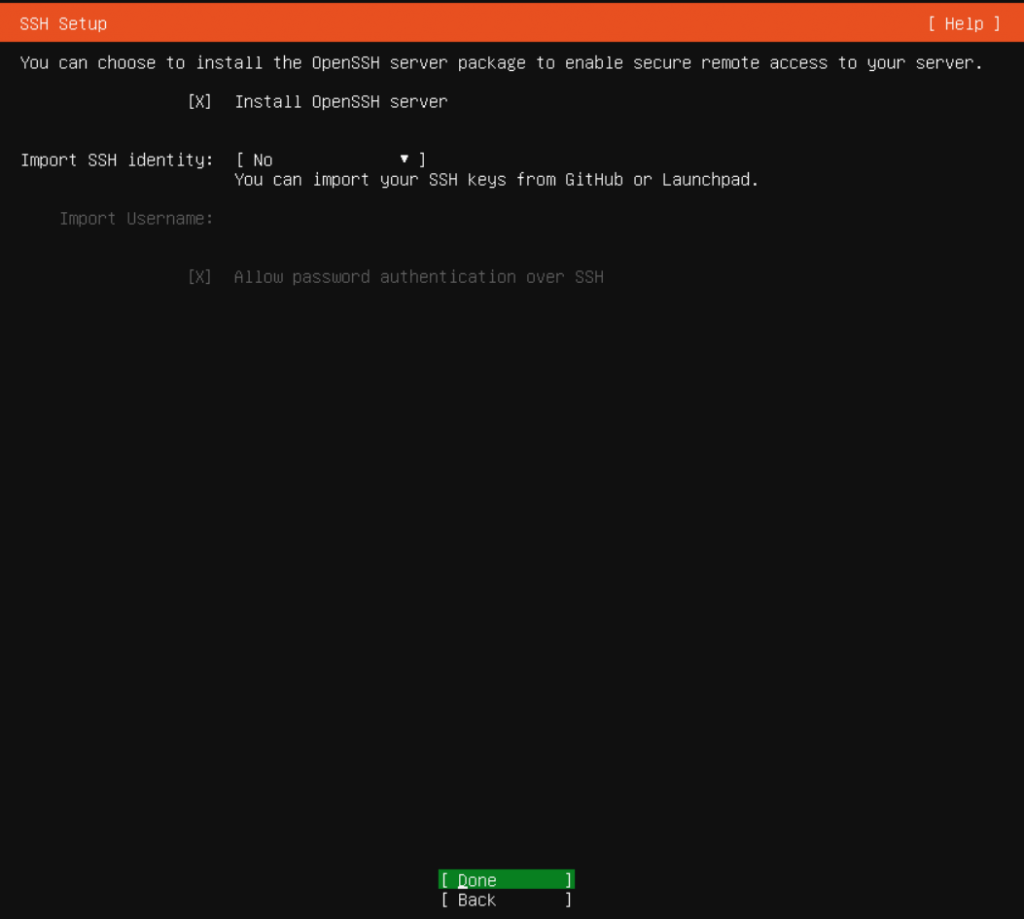
Need ssh access
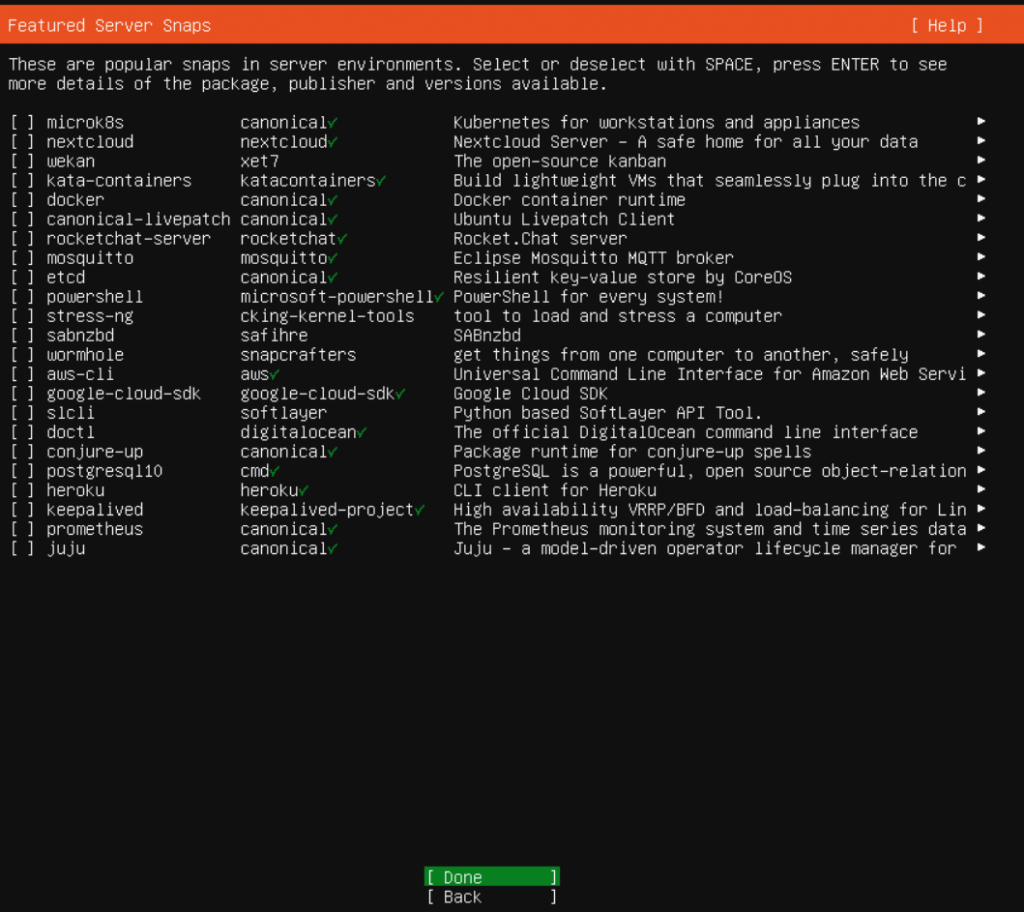
No extra packages
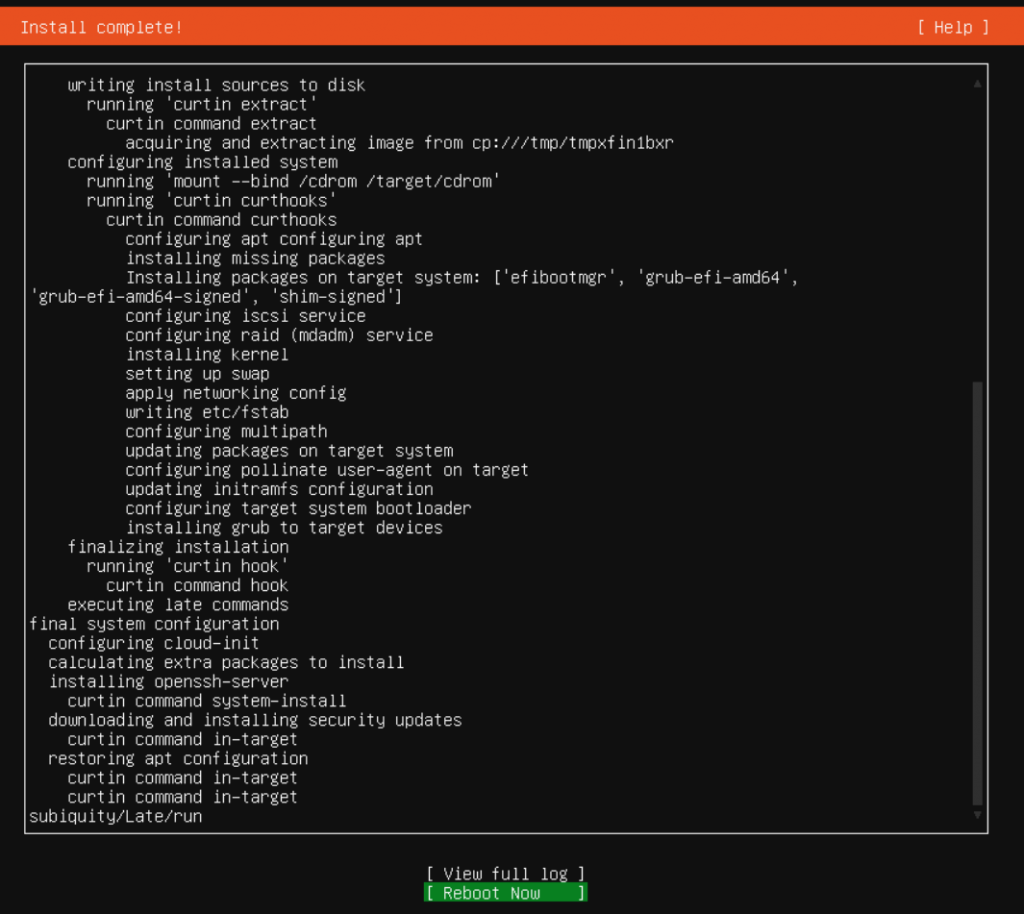
Wait for installation and security updates installation to complete
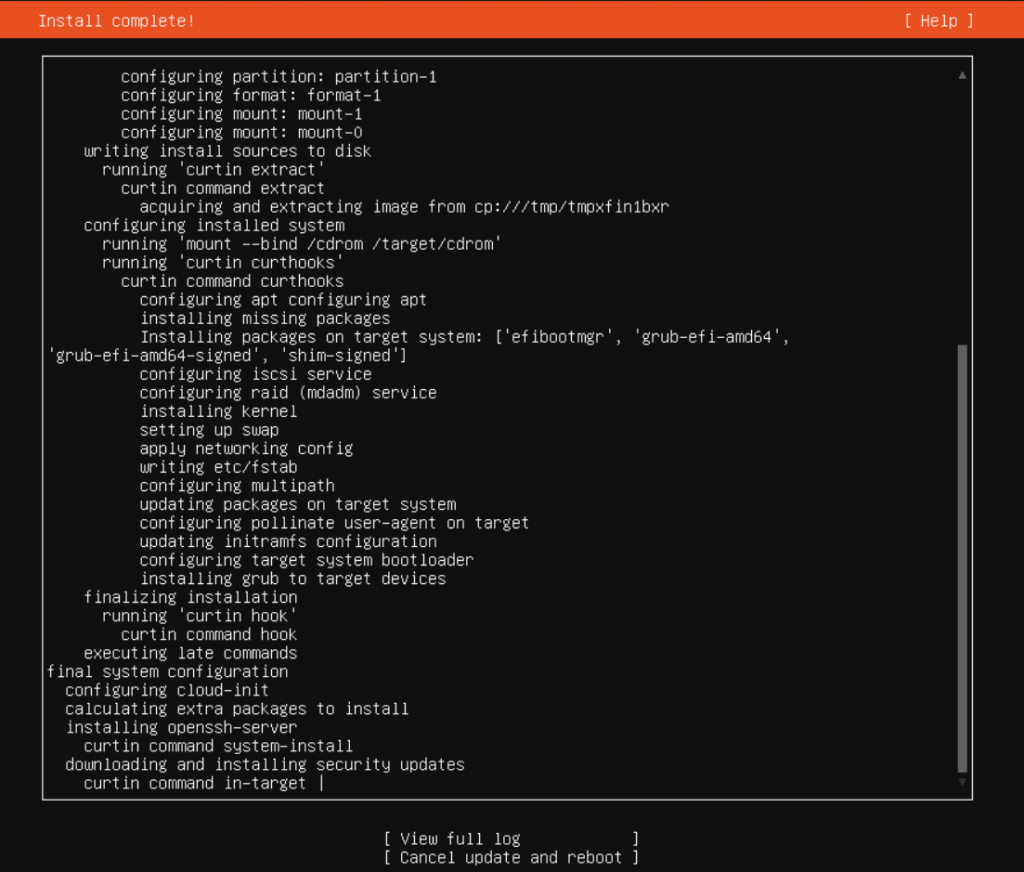
Installation completed. Reboot.
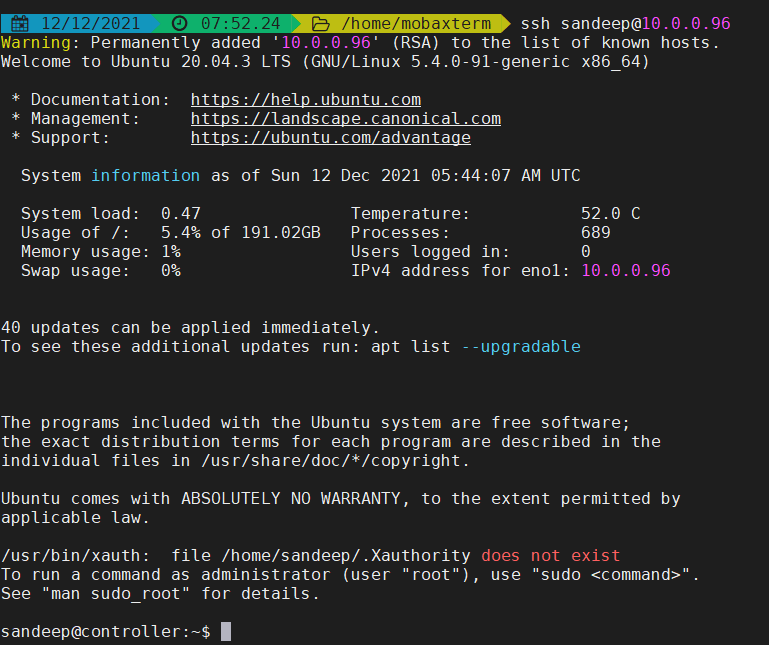
Login to the server using the user account configured during installation
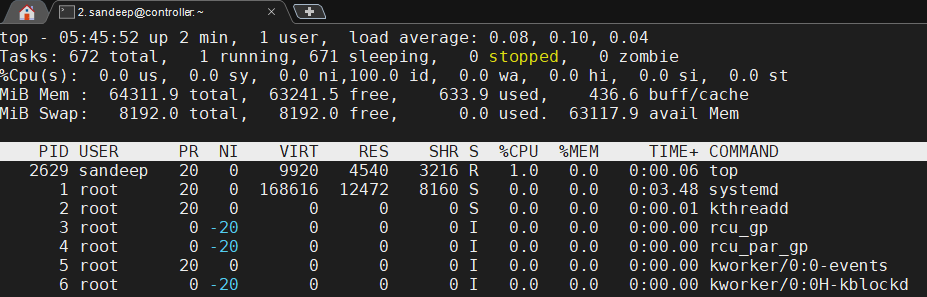
Is swap enabled and being used? Check the top command output.
Swap image file present

Disable swap, remove swap image file, and reboot.
sudo systemctl stop swap.img.swap
sudo systemctl disable swap.img.swap
sudo systemctl mask swap.img.swap

sudo swapoff -a
sudo rm -f /swap.img
sudo reboot
Swap disabled

Update repository, upgrade packages and install required packages (mdraid2 to avoid errors in Syslog during startup)
sudo apt update
sudo apt upgrade -y
sudo apt install -y ifupdown net-tools curl make libblockdev-mdraid2
We will be enabling legacy networking. Let us ensure resolv.conf gets updated with required configurations on boot always. Uncomment and update the configurations in /etc/systemd/resolved.conf
#  This file is part of systemd.
#
#  systemd is free software; you can redistribute it and/or modify it
#  under the terms of the GNU Lesser General Public License as published by
#  the Free Software Foundation; either version 2.1 of the License, or
#  (at your option) any later version.
#
# Entries in this file show the compile time defaults.
# You can change settings by editing this file.
# Defaults can be restored by simply deleting this file.
#
# See resolved.conf(5) for details

[Resolve]
DNS=10.0.0.1
FallbackDNS=8.8.8.8
Domains=******
#LLMNR=no
#MulticastDNS=no
#DNSSEC=no
#DNSOverTLS=no
#Cache=no-negative
#DNSStubListener=yes
#ReadEtcHosts=yes
Create a soft link to the systemd generated resolv.conf
sudo ln -sf /run/systemd/resolve/resolv.conf /etc/resolv.conf Update the network configuration – /etc/network/interfaces
Note: Use the ifconfig or ‘ip a’ command to find the interface name. (In my case, it was eno1)
# interfaces(5) file used by ifup(8) and ifdown(8)
# Include files from /etc/network/interfaces.d:
source-directory /etc/network/interfaces.d

auto eno1
iface eno1 inet static
    address 10.0.0.96/16
    gateway 10.0.0.1
Perform the following from the console – as we will lose connectivity.
Disable systemd-networkd, remove netplan, enable legacy networking
sudo systemctl stop systemd-networkd.socket systemd-networkd networkd-dispatcher.service systemd-networkd-wait-online

sudo systemctl disable systemd-networkd.socket systemd-networkd networkd-dispatcher.service systemd-networkd-wait-online

sudo systemctl mask systemd-networkd.socket systemd-networkd networkd-dispatcher.service systemd-networkd-wait-online

sudo apt -y purge nplan netplan.io

sudo systemctl unmask networking
sudo systemctl enable networking

reboot
Set password for the root account
sandeep@controller:~$ sudo passwd
[sudo] password for sandeep:
New password:
Retype new password:
passwd: password updated successfully
sandeep@controller:~$
To enable remote login using the root account, edit /etc/ssh/sshd_config, uncomment and update the following configurations.
#LoginGraceTime 2m

PermitRootLogin yes

#StrictModes yes
#MaxAuthTries 6
#MaxSessions 10

PubkeyAuthentication yes

# Expect .ssh/authorized_keys2 to be disregarded by default in future.

AuthorizedKeysFile      .ssh/authorized_keys .ssh/authorized_keys2
We do not want unattended-upgrades – edit /etc/apt/apt.conf.d/20auto-upgrades and update as shown below
APT::Periodic::Update-Package-Lists "0";
APT::Periodic::Unattended-Upgrade "0";
Disable services and purge
sudo systemctl disable unattended-upgrades.service
sudo systemctl mask unattended-upgrades.service
sudo systemctl disable apt-daily-upgrade.timer
sudo systemctl mask apt-daily-upgrade.timer
sudo apt remove -y --purge unattended-upgrades
Remove snaps and purge snapd (use sudo snap list to get a list of snaps, if remove fails due to dependency resolve the same. Observed while installing on KVM guest core20 was listed) (Disable AppArmor service too)
sudo snap remove lxd
sudo snap remove core18
sudo snap remove snapd

sudo systemctl stop snapd.service snapd.socket snapd.seeded.service apparmor.service snapd.apparmor.service
sudo systemctl disable snapd.service snapd.socket snapd.seeded.service apparmor.service snapd.apparmor.service
sudo systemctl mask snapd.service snapd.socket snapd.seeded.service apparmor.service snapd.apparmor.service

# All other snapd related services

sudo systemctl stop snapd.failure.service snapd.autoimport.service snapd.recovery-chooser-trigger.service snapd.snap-repair.service snapd.system-shutdown.service  snapd.core-fixup.service snapd.snap-repair.timer

sudo systemctl disable snapd.failure.service snapd.autoimport.service snapd.recovery-chooser-trigger.service snapd.snap-repair.service snapd.system-shutdown.service  snapd.core-fixup.service snapd.snap-repair.timer

sudo systemctl mask snapd.failure.service snapd.autoimport.service snapd.recovery-chooser-trigger.service snapd.snap-repair.service snapd.system-shutdown.service  snapd.core-fixup.service snapd.snap-repair.timer

sudo apt purge -y snapd

sudo apt -y autoremove
Remove any stale folders/files.
rm -rf ~/snap
sudo rm -rf /snap
sudo rm -rf /var/snap
sudo rm -rf /var/lib/snapd
Disable motd-news (message of the day?) – edit and update configuration in /etc/default/motd-news as shown below.
# Enable/disable the dynamic MOTD news service
# This is a useful way to provide dynamic, informative
# information pertinent to the users and administrators
# of the local system
ENABLED=0

# Configure the source of dynamic MOTD news
# White space separated list of 0 to many news services
# For security reasons, these must be https
# and have a valid certificate
# Canonical runs a service at motd.ubuntu.com, and you
# can easily run one too
URLS="https://motd.ubuntu.com"

# Specify the time in seconds, you're willing to wait for
# dynamic MOTD news
# Note that news messages are fetched in the background by
# a systemd timer, so this should never block boot or login
WAIT=5
Disable and mask service
# systemctl disable motd-news.timer
Removed /etc/systemd/system/timers.target.wants/motd-news.timer.

# systemctl mask motd-news.timer
Created symlink /etc/systemd/system/motd-news.timer → /dev/null.
Comment configurations in /etc/pam.d/sshd as shown below
# Print the message of the day upon successful login.
# This includes a dynamically generated part from /run/motd.dynamic
# and a static (admin-editable) part from /etc/motd.

#session    optional     pam_motd.so  motd=/run/motd.dynamic
#session    optional     pam_motd.so noupdate


# Print the status of the user's mailbox upon successful login.

#session    optional     pam_mail.so standard noenv # [1]
Remove execute permissions motd-news scripts as shown below and restart sshd services
sudo chmod -x /etc/update-motd.d/10-help-text /etc/update-motd.d/50-motd-news
sudo service sshd restart
Set the timezone
sandeep@controller:~$ date
Sun 12 Dec 2021 06:44:51 AM UTC

sandeep@controller:~$ sudo timedatectl set-timezone Asia/Kolkata

sandeep@controller:~$ date
Sun 12 Dec 2021 12:15:13 PM IST
Increase the max number of file descriptors and processes – add the following in /etc/security/limits.conf and reboot.
*       hard    nofile  65536
*       soft    nofile  65536
*       hard    nproc   65536
*       soft    nproc   65536